Showing posts with label DIY for children. Show all posts

Thursday, April 16, 2015

DIY Beads Bracelet


How adorable are these bracelet right?  They looked like little colourful candies and i love how you can create your own style by mixing and matching the beads to form a bracelet.  I did this project when i was having a little workshop with the kids and they enjoyed making these bracelets.


Look at the materials needed, cute and colourful beads


This will be a lovely gift idea for little girls as you can create names for them or special message onto the bracelets.


Wednesday, March 4, 2015

Flower Crown


I was feeling whimsical today, so I thought i will give it a try to make these flower crown and I loved it.  I love the combination of pastel colours of pink and purple.  I would want to try to make hairbands with these lovely flowers too.  I feel very bohemian with this look and it looks fresh and sweet.

Monday, February 9, 2015

Angpow packets


Found these beautiful wrapping papers and thought of making into colourful angpows for this coming Chinese New Year. Wishing everyone great health and a  year of prosperity coming your way.

Friday, July 4, 2014

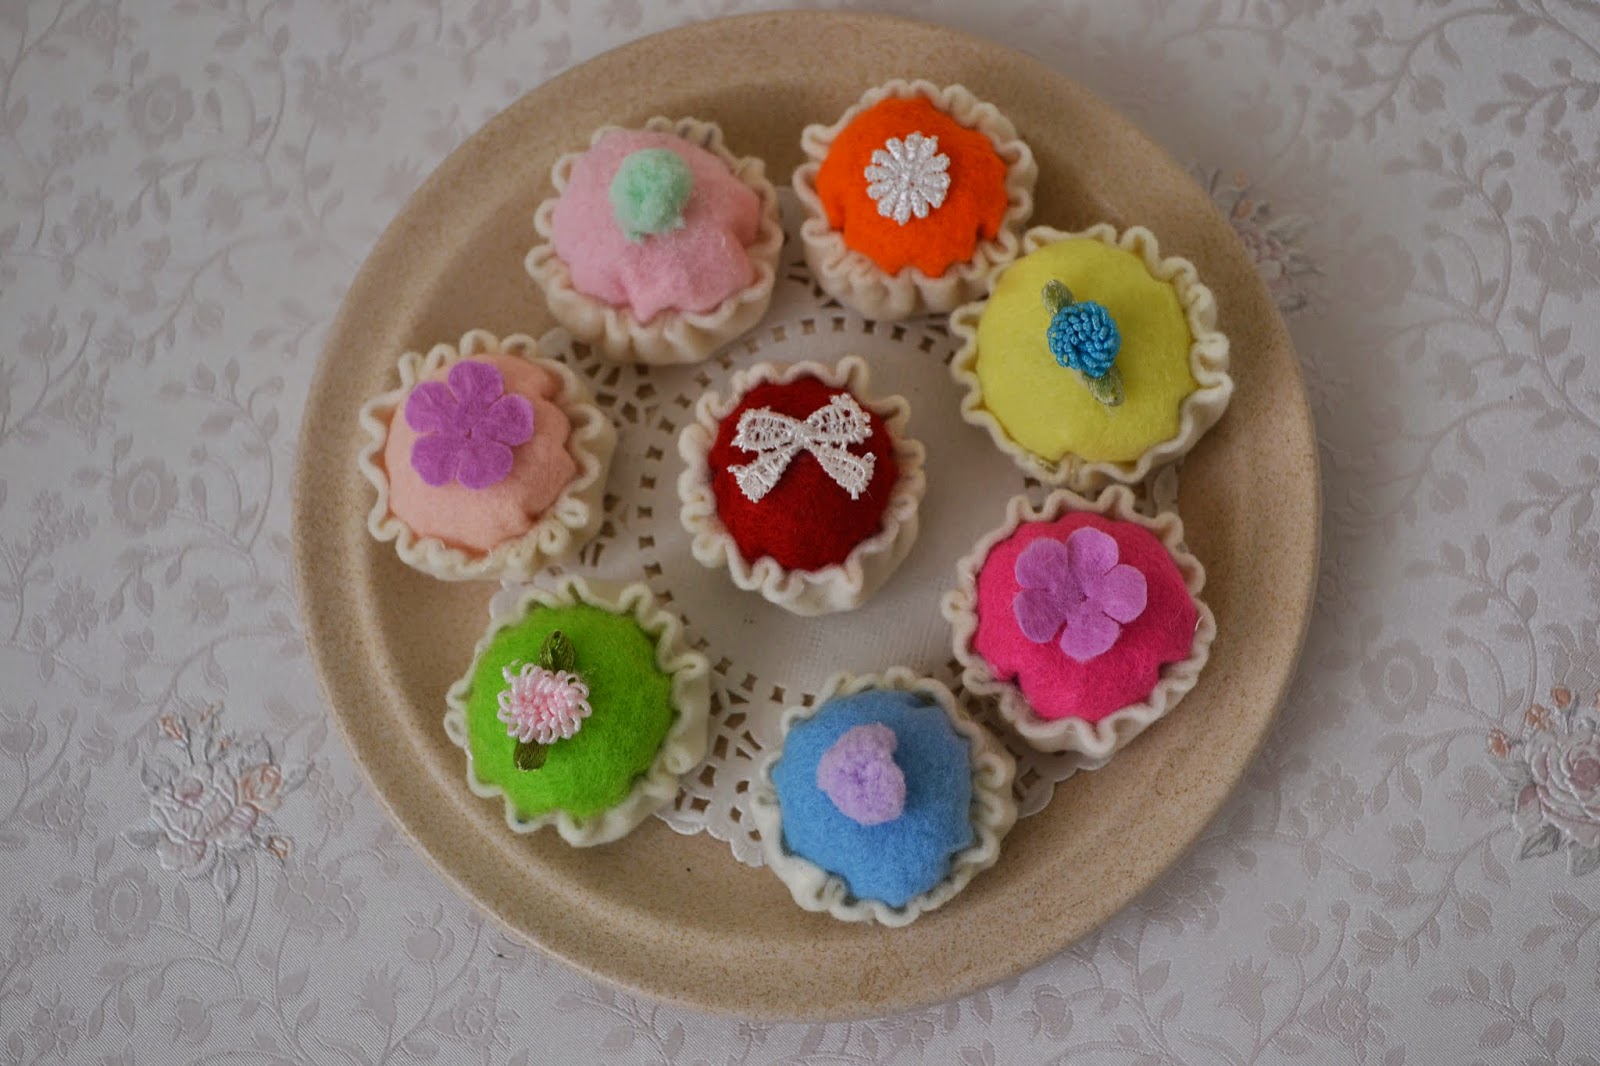
Little Miniature Cupcakes


I've always love cupcakes because I think they look absolutely lovely with the detailed toppings of each cupcakes.  So since I'm not good at baking, I made these felt cupcakes instead for the girls tea party.


I made in every colour I could find and now I have one set of rainbow colours of miniature cupcakes.  The best thing is, it's calorie free too.  Just bring out the tea set and we are ready to have a little tea party.


This is the size of the cupcake and this red is my favourite.. which is your favourite colour of cupcake?


Have a sweetest day and thank you for visiting my blog.

Friday, June 6, 2014

Personalized Paper Bag


These are the little personalized paper bags that I design for the girl's party as bags for special door gifts.
 

What I did was draw some cute paper dolls to decorate the paper bags.. (I'm not good at drawing but I tried very hard to make the paper dolls looked sweet and cute)


I chose this checkered  pattern to make a little gift bag.  If it's too time consuming to make your own paper bag, just buy it from the store and choose whatever designs that you like.  For this paper bag, I glued a doily paper at the top.


Cut the little paper dolls and glue it on the paper bags.  I even wrote their names onto the paper bags,  so it's more personalized for the girls.

Have a nice day and good night!

Sunday, April 27, 2014

Felt Organizer

 
As my felt mania continues, what better way to be creative than making these fun felt organizers.  I got this idea from a friend of mine and I like her little felt organizers so much and I decided to make a few for myself.
 
 
Obviously the bright blue polka dot is all mine as I'm also obsessed with polka dots so this is a perfect organizer for me.  I decorated  with a simple crochet flower and little cute buttons.  I did make another organizer for Jeremy and his organizer is super adorable too with printed felt elephants.
 
 
From the inside, there's a little pocket to put my receipts and banking slips for the month, so I can keep track on my daily expenses.  Here I used my yoyo flower clip to hold all my receipts.  If you are interested in making the yoyo flower clip,  I will provide the link for you http://bowsribbons.blogspot.com/2014/01/cute-yoyo-flower-clip.html


As for little Jeremy's organizer.. there's a little pocket too and a pen holder for him.  I make an elephant clip for him to match the organizer. 


I really had fun making these and I think its a simple and cute organizer.   Have a great day everyone.

xoxo

Sunday, April 20, 2014

Paperbag Elephant Puppet


Since today Yun Ji was not feeling well and missed one day of school.. I thought of doing a little project to cheer him up.  So we did this funny looking paperbag elephant puppet. This will be my second post for today..hope it's not too much.

 
For this project,  you need a paper bag.  You can make your own bag or use a recycle one.  For this project, we make our own paper bag using grey as the elephant's body.  I've already cut out some felts for the eyes, the big ears, the trunk and tail.  I used a black colour paper for the eyelashes and some cute stickers to decorate its body.

 
First step,   glue the ears to the side at the far left and right corner (as the picture shown here).  Then go ahead glue the eyelashes first before putting the eyes.

 
The next step,  just add on the trunk and the tail to the elephant and it's nearly completed.

 
To make it look more colourful, I stick on some stickers onto the paper bag and this makes the elephant seems more cheerful and adorable.


Finally I added a tiny little bow but it's optional, if you don't want it to be a female elephant :).  Hope this little tutorial helps and give you some ideas on it.  You can actually make all sorts animals using colourful felt and cute materials.. just be creative.

Popcorn Snacks


During a little get together with the kids at my home.. what a better way to provide them are some popcorn snacks. 

I bought this Popcorn in Sweden and it's a healthy snack for the kids because it's without sugar and caramel.  Just put the whole paper bag into the microwave for a few minutes and it's done.  Easy and fast.


For a cute and interesting display, take a few baking cups and fill it up with popcorns.  I added little poms poms to make it more colourful and cuter especially for the children.  It's delicious even if it's not sweet since no one was complaining.. so I hope everyone were enjoying the snack.

Friday, April 11, 2014

Recycle Tin Easter Bunny


How cute is this little Easter Bunny tin can.  I'm going to show you a simple tutorial on this and it's super easy and fun.


You need an empty can for this project and as you can see i found some colourful and bright masking tape..and I did this craft because Ms Coco Flower did some amazing crafts using masking tape so i was inspired to make some of my own.  Use the masking tape to tape it round the can. I suggest buy some colourful tape for this cause it will make it more cheerful.


Next prepare some felt for this project.  I've already made a bunny and some leaves and flowers...


Glue your bunny head onto the tin this way. Actually It's up to you if you want it to be lower or higher but i thought this height is just nice because I love how the bunny's ears are sticking out from the tin.

For the felt leaves and flowers, just glue at the bottom of the tin and it's done.

So now you have your very own Easter Bunny decorated tin..  Super cute and colourful for the Easter.

Thursday, March 20, 2014

Little Muffins Toppers

Cute little muffin top.

What I did was took a small cupcake liner and cut out some left overs felt elephants and glue onto the cupcake liners.. The decoration looks adorable and taste as good and the muffins were baked by my friend.

It's the school break again and Jeremy is the happiest boy at this moment....enjoying his muffins and planning to visit his grandparents during the school holidays.  Happy Holidays everyone....

Saturday, March 15, 2014

Party hat

I'm over joyed with this project that i did for Jeremy. His glittery blue hat and his cute little moustache ( i used a brown eyeliner to draw up the moustache and his eyebrows)


I bought this plain hat and decided to make a glitter hat for him... so it's super easy, just buy any colour of glitter that you want and spread it evenly onto the hat with glue.  You need a good amount of glitters to cover the whole hat and it can be very messy.  I just added a black ribbon to make a border around  the hat.
The many expressions of him. This is priceless...
It's still the weekend have fun!

Friday, March 14, 2014

Animal Pins

I managed to make a  few felt animal pins for embellishment.  I really like the felt monkey,  it looks super cute and the little lion ( just for your information, it's a sweet lion and not a bear because someone commented it looks like a bear/sun)


You can make a boring recycle bag and transform it into a cute bag by pinning the felt animals onto it and you are good to go..


As you can see, Jeremy is doing some modelling with the bag.. Here comes another weekend again. Have a nice weekend and have fun.

xoxo


LinkWithin

Related Posts with Thumbnails